Honda Pan-European ST1300A6  
Honda ST1300 A6 Fairing Removal and Fitting
Lower Cowl Front

The top two holes have the larger trim clip push rivets. Difficult for me to get my large fingers in to pull out the centre pin. I usually have to use long nosed pliers which I slip behind the head of the pin to pop the head out.

The bottom holes have cross head bolts with a shoulder and a flange - identical to the ones described later for the fairing pockets. I really dont like these - its difficult to get a screwdriver in to undo them (because of the front wheel), and even more difficult to apply enough pressure to overcome the hold created by the build up of muck and rust. I've replaced mine with ordinary hex head bolts and washers. I use thread locking compound and tighten them little more than finger tight to avoid undue pressure on the faring plastic.

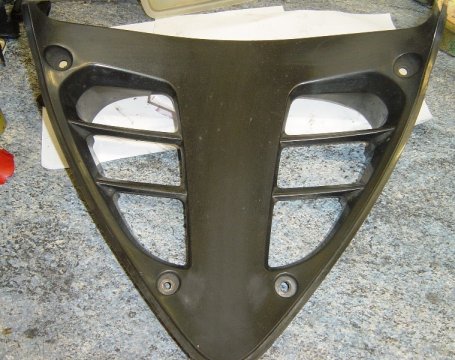
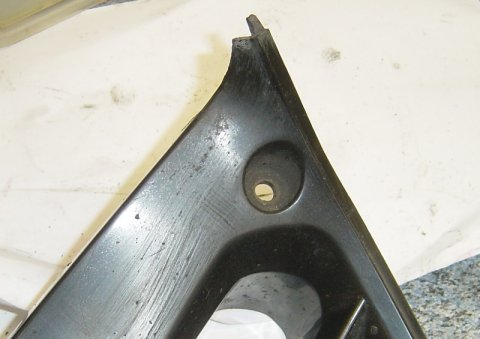
When reassembling, this front cowl piece goes in last. Note the tabs on here and similar tabs on the lower fairing which slot in behind these tabs. When you offer it into position, check that the two tabs on each side are correctly aligned. Note the lip which has to fit behind the groove on the mid fairing.

Although this bit goes in last, its important not to put in all of the pop rivets on the lower cowl and on the inner fairing. If you do, you'll have to pop them out again to fit this bit !!


These pages are merely a personal record of maintaining a Honda ST1300.
Anyone carrying out similar work should acquaint themselves with the official, correct procedures or employ the services of a qualified technician.

Website ©2011 JFHeath