
The 3pin connector pushes onto the rear of the bulb easily. It is shake proof, and designed to remain in place no matter what. Removing the connector is a knack. It requires skill, dexterity, small hands, strong fingers, a liberal amount of swearing, and a little bit of know how. I can manage the liberal amount of swearing bit.
Click the image to see a detailed version.
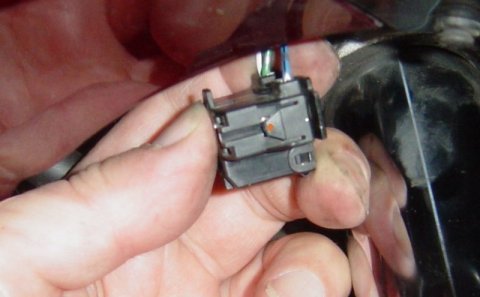
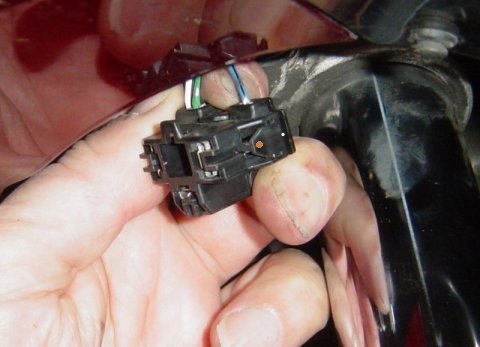
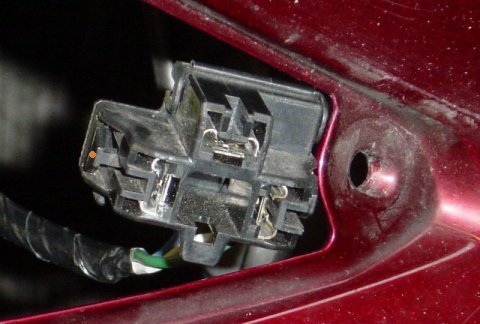
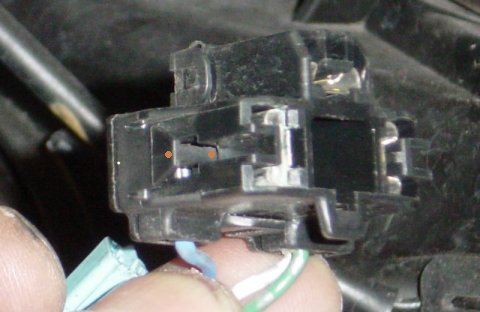
In each of the photos, the orange spot shows the pin that needs to be pressed in. You have to use finger and thumb and press on both sides. I've never had a good look at what is happening, but certainly pressing the pin in will release the spade from the connector's grip.
|
|
|
|
|
|
Socket upside down. |
Socket upside down, showing pin protruding towards the bulb's spade connector. (to left of orange dot). |
Socket in correct orientation, viewed from bulb end. Note the pin marked with an orange dot. |
A better view of the release pin. |
Get a light, and look from the petrol tank, under the handle bars to see the connector that you are trying to remove. You might be able to get in from this position, but I cant.
Kneel on the floor in front of the bike, with the front wheel on your left side. Wheel pointing straight forward.
Grope upwards in front of forks and behind the fairing to find the bulb wiring. You may wish to move the front wheel slightly towards you to make a little space - the fork yolk bolts get in the way. You can tell that you have the right component - you can feel the wires at the back of the connector, and the large rubber shroud which is fitted around the bulb and the housing.
Use thumb and index finger to feel for the two sides. Slide thumb and index finger towards the bulb. Press. You will feel the plastic tab move inwards. The part that you are pressing is marked with an orange dot on some of the photos.
The amount of pressure required is not a lot but if you can't feel the sides move in you are probably pressing in the wrong place. Look at the photos. The end of the tab you are pressing will be quite close to the waterproof shroud. When I do it, the size of my hands prevent me from easily getting my thumb in the correct position for the tab to move. But by squeezing in, and pulling back slightly, the connector pops off.
Once you have removed the bulb, get some dilectric grease and apply it to the pins on the old bulb. Poke the connector into the open - up towards the handlebars is probably easiest. Check the squeezing motion, look at what is happening. Put the old bulb in and practice removing it a few times - which will also get the grease worked into the connectors! Dont so this with the new bulb, because you will get grease on it.
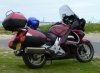
These pages are merely a personal record of maintaining a
Honda ST1300.
Anyone carrying out similar work should acquaint themselves with the official,
correct procedures or employ the services of a qualified technician.