
|
|
|
|
|
|
|
Two release keys for a car radio. They'll do ! |
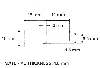
Diagram for tensioner tool, and my version. |
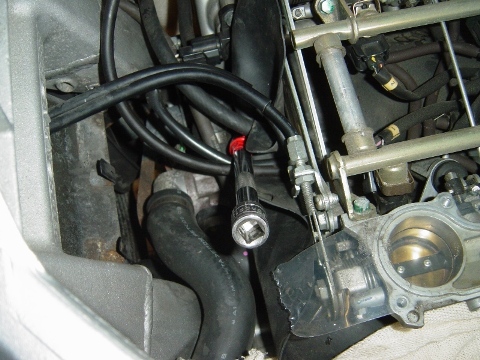
Close up of my version wedged into a torx socket. |
Accessing the tensioner bolt for the right hand cylinder. |
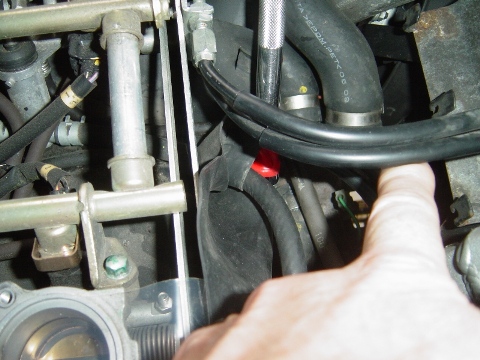
And here, viewd from the right side of the bike. Ignore my finger, it's holding the throttle cable to one side. See silver shaft and red tape. |

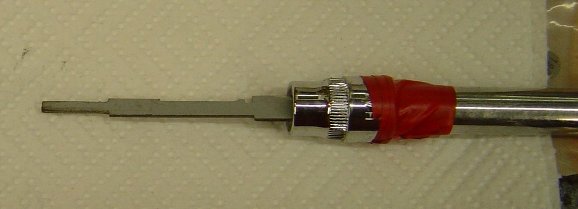

Take the time to make a couple of tools, one with a long handle. I found a couple of car radio release keys which weren't the correct size, but close enough to do the job well.
The tensioner for the right cylinders is difficult to get at. You need to remove the air filter housing, top and bottom. Be careful of the circlips on the two tubes that attach to the bottom, and make sure you have a good fit driver for the Philips screws.
The tensioner is just visible if you move the rubbers and cables to one side. The 4th photo above has the tension tool in place.
The tensioner is released by winding up the spring - clockwise. This releases the pressure on the tensioner, which can then allow a little slack in the cam chain. The tensioner itself isn't sprung. Its the screw that is sprung. In use, as the chain becomes slacker, the screw is automatically turned to exhert pressure on the tensioner. It is not possible to press in the tensioner in by hand - you have to turn the screw to do this. Worthwhile remembering this when removing the tool. Let the spring control the anticlockwise turning of the tool. Dont turn it yourself.
Note the clear protective tape stuck over the throttle body inlets.

These pages are merely a personal record of maintaining a
Honda ST1300.
Anyone carrying out similar work should acquaint themselves with the official,
correct procedures or employ the services of a qualified technician.