
Both sides are the same. Photos here are for the right hand side fairing.
Click the image to get a higher resolution version.
|
|
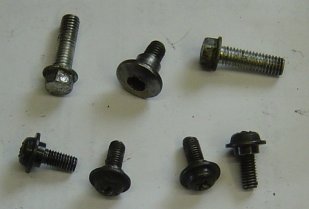
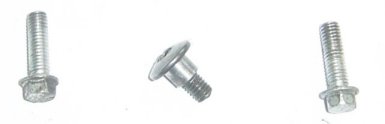
These are the fixings that hold the middle fairing onto the bike. Note the allen bolt. The shoulder on this is much deeper than the other bolts that you have laready taken off - this is to cater for the extra thickness of fairing that this bolt goes through. |
|
i) Remove the mirror cover. It knocks off and there is a cable tie arrangement to stop it falling on the floor. Don't trust it. While you are there, remove the mirror rubbers. Note where the rubber is attached to the mirror cover and to the fairing. The pointy bit at the top needs lifting off vertically. Don't pull it - you will snap off the tang onto which it is impaled. |
|
|
ii) Dont forget to unbolt the tip-over knock-off covers. The Allen bolt is underneath. Remove the cover - grab it in both hands and pinch top and bottom together close to the fairing to pop it away, and then move it away backwards to release the tab at the front. |
|
|
|
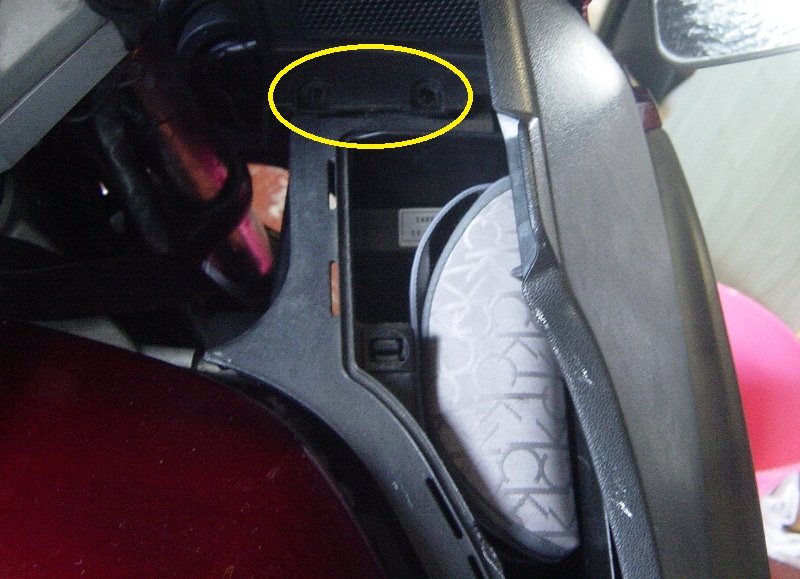
iii) Remove the two cross head screw inside the fairing pocket (these are the same as the ones we have encountered before - shoulder and flange). |
|
|
iv) Remove the same type of screw from behind the mirror housing. There are three - but you need only remove the bottom two. The mirror can stay where it is.
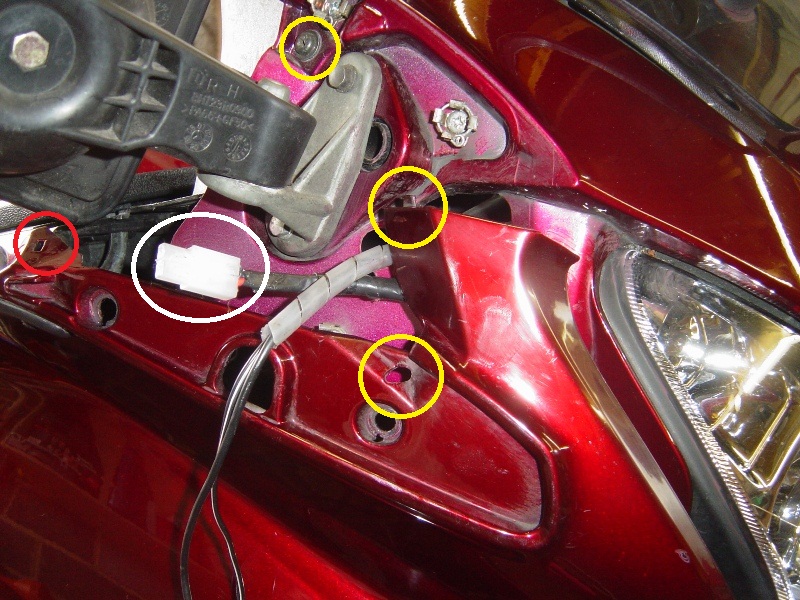
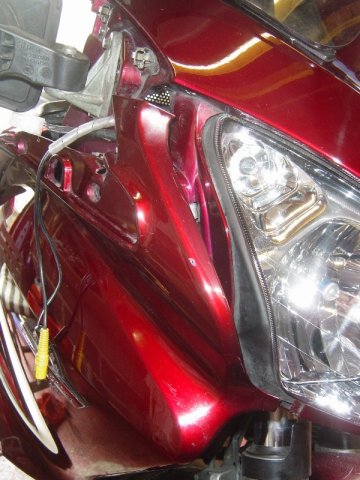
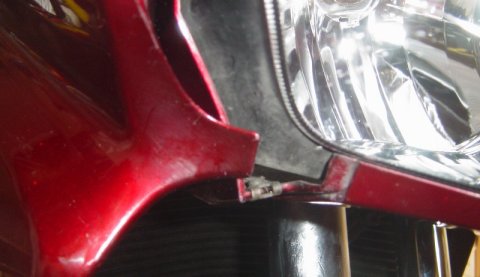
When reassembling, make sure that the lugs and pins are lined up
before tightening any of the screws. In the enlarged photo I have circled: (Ignore the other lead in the spiral binding) In particular check the lug under the headlight - see pictures below. |
|
|
v) Remove the two small hexagon head bolts from either side of the fairing behind the tip-over cover. Note the collar - it usually stays in place in the rubber mounting. |
|
|
vi) Make sure that the fairing is not attached anywhere before removing the final bolt. If you have heated grip control in the left fairing, lift it out and turn it to slide back through its hole. Make sure the indicator cable will not snag as the fairing is lifted away - push it through the hole. Remove the Allen bolt from the top of the side vent. Don't let the fairing drop on the floor. Manoeuvre it carefully out of its locating tags around the side of the headlight, and lift the fairing away. When reassembling, make sure that you find the indicator cable and thread it through the correct hole in the fairing. (mine has a different connector now). The hole with the slot is for the mirror restraining strap. Ignore the spiral bound wire and yellow phone lead - thats for a bullet cam that I have mounted in my right hand mirror. Also - ensure that the temperature sensor wire is still lodged near the horn so that you can find it during the last stages of putting the fairing back. You have been warned ! |
|
|
|
|
|
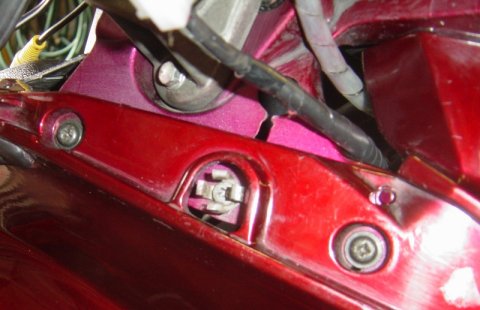
The right hand side with fairing removed. Note (circled yellow) the fixing points for the main fairing bolts. The top fixing point is a "hole on a stick". The threaded nut is on a shaft which is screwed into the frame of the bike. This needs to be tight - or thread locked into the frame. Note also in green, the connector for the temperature sensor tucked up with the horn for easy access later. Also, a weird place to find it, a bleed nipple for bleeding the secondary master cylinder circuit on front left wheel with rear brake pedal. |


These pages are merely a personal record of maintaining a
Honda ST1300.
Anyone carrying out similar work should acquaint themselves with the official,
correct procedures or employ the services of a qualified technician.